
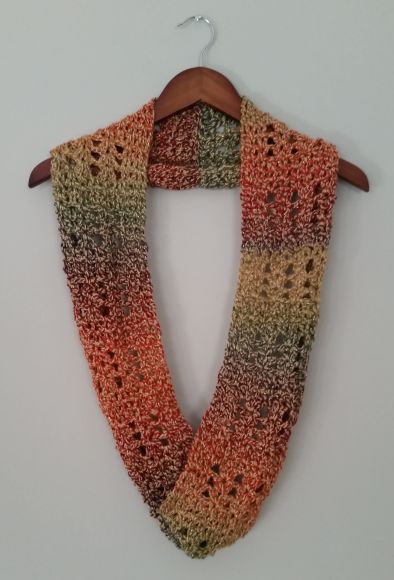
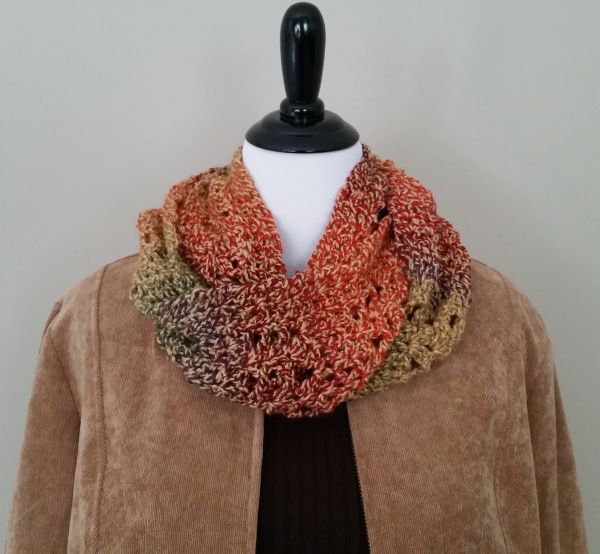
Hello! Today I’d like to share my free crochet scarf pattern for the Fall Sunburst Infinity Scarf. When I saw the gold sparkles and amazing colors in this yarn, I immediately knew that a gorgeous fall scarf would be next on my to-do list.
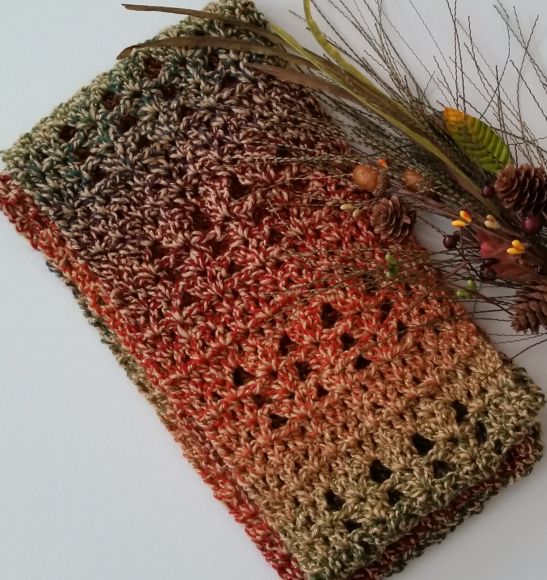
For this project, I used Yarn Bee Dazzling yarn in Sunburst and the overall effect really makes me think of bright sunlight shining over an autumn forest. The pattern is a simple, modified v-stitch. It has just enough repetition to allow it to be worked up quickly, with just enough variation to make it interesting. Loop it once for a long scarf or twice to create a cowl!
I hope you enjoy this free crochet scarf pattern! Interested in more free patterns?
PIN for later HERE
ADD to your Ravelry que HERE
Fall Sunburst Infinity Scarf
Materials Used:
- 2 skeins Yarn Bee Dazzling yarn in Sunburst
- Size J/10 – 6.00 mm crochet hook
- Tapestry needle
Abbreviations:
ch(s) = chain(s)
st(s) = stitch(es)
sp = space
dc = double crochet
American crochet terms used throughout
Gauge:
Not important for this project
Finished Size Approximately:
6.75″ wide
52″ long prior to ends being joined (26″ long when laid flat with one half on top of the other)
Instructions:
Note: The instruction “2dc into V-sp” means to make 2dc in the space between the 2dc that make the V from the row below.
Row 1:
Ch 26, 2dc in 4th ch from hook, skip ch, *2dc in next ch, skip ch; repeat from * across, ending with 1dc in last ch, turn.
Row 2:
Ch 3 (counts as dc here and throughout), 2dc in first V-sp, 2 dc in next V-sp and in each V-sp across, ending with 1dc in turning ch-3 sp, turn.
Row 3:
Ch 3, 2dc in first V-sp, 2dc in next V-sp, [ch 2, skip next V-sp, 2dc in next V-sp] three times, ch 2, skip next V-sp, 2dc in next V-sp, 2dc in last V-sp, 1dc in turning ch-3 sp, turn.
Row 4:
Ch 3, 2dc in first V-sp, 2dc in next V-sp, [ch 2, 2dc in next V-sp] three times, ch 2, 2dc in next V-sp, 2dc in last V-sp, 1dc in turning ch-3 sp, turn.
Row 5:
Repeat row 4.
Row 6:
Ch 3, 2dc in first V-sp, 2dc in next V-sp, [2dc in ch-2 sp, 2dc in next V-sp] four times, 2dc in last V-sp, 1dc in turning ch-3 sp, turn.
Row 7:
Repeat row 2.
Row 8:
Repeat row 2.
Repeat rows 3-8 until scarf is desired length, but ending on a row 6 repeat. (I was happy with the length of mine after 14 repeats, but had enough yarn left from the second skein that I could have made the scarf much longer if I had wanted to).
Fasten off leaving a long tail of yarn. Using a tapestry needle, use the tail to sew your ending row and beginning row together to create a continuous infinity scarf. Weave in ends and enjoy!
If you make one I’d love to see it. You can tag me @cashmeredandelions on Instagram!
I love this pattern, I already made one from it and I was wondering what the multiple for this is, as I was wanting to try to make a version on thinner yarn so need to make it a touch wider? Thank you!
Okay, this was a tough one, because I really want you to be able to make this scarf however you want to. Unfortunately, the way I have centered the holes in this pattern, simply increasing or decreasing stitches on the beginning chain would not make the pattern work. I have tried to think of an easy workaround, and simply can’t. I’m so sorry for that. My best suggestion would be to size up on your hook by at least two sizes and see if that gets you close to gauge. This will cause your scarf have a looser weave than mine, but I think it would still look very pretty. I have a few scarves with a loose weave and they are some of my favorite. I hope this helps!
i think it depends on how you wanna do your multiples. if you want to keep the 4 spaces with the 2 v-stitches you can do multiples of 24 + 2. if you want more of the ch2 spaces then you do multiples of 20+4 and then add 2 for the ch3 you make in the first row. i hope this helps and i hope it works! i haven’t tried it yet.
How many yards does this use?
512 yards
Loved working this pattern. I go in spurts with crocheting. It’s been quite a few months since I’d done any and this pattern for my daughters Hanukkah gift was easy to follow. Thanks! Hope to get back in the groove.
I’m so glad you like it! Makes my day!
Why couldn’t Maxwell make a second scarf and sew together for the width and then sew the ends to form circle?
That’s a great idea! Thank you for sharing it!
I am not sure about the 2dc into v-sp
Can I see.it.somewhere? Like a tutorial?
Thanks for sharing the pattern
Sure thing! The website “thesprucecrafts.com” has a great tutorial called “Crocheting the Basic V-Stitch”. There is a photo tutorial and photo 10 shows how to work a double crochet into the v-space.
I found your site. nice work that you doing. I like it very much. I hope everyone will love it. I want to say thanks for the helpful work. keep it up.
I’m starting this and on row 2 I do not have a V-stitch in previous row…thought Row 1 was 2dc,skst, continued…where is the Vstitch that Row 2 needs to be stitched in???
I’m totally missing it…
Each 2dc worked on row one creates a “v”. If you do not “see” the v-shape, that is okay because you will probably “see” it shortly. So for row 2 when the instructions say to 2dc in the v-space, that means to work 2dc in between each 2dc worked on row one. This is explained in the note at the beginning of the instructions. Hope this helps!